Facebook has become an essential channel for businesses in the wedding industry to communicate with their customers. There are almost 13 million Facebook users in Australia, and more than half of those are in the 18-35 age group – a prime audience for wedding suppliers – so creating a Facebook page for your business today isn’t a luxury, it’s becoming a necessity.
In a previous post we looked at the differences between a Facebook profile, which is a personal page where you can connect with friends, and a Facebook page, which can be viewed and ‘liked’ by anyone and is generally more appropriate for a business.
Here are five simple steps to set up a Facebook page for businesses looking to get started on Australia’s most popular social network.
Step 1 – Log into Facebook
To create a Facebook page you must first have a personal Facebook profile to link it to. This could be the profile you already use for connecting with friends and family, or you could set up a new profile just for business use. Even though your page will be linked to your profile for admin purposes no personal information from your profile will be shared on your page. You can also link the personal profiles of other business partners or employees once the page is set up, so they can login via their personal profile to update the Facebook page.
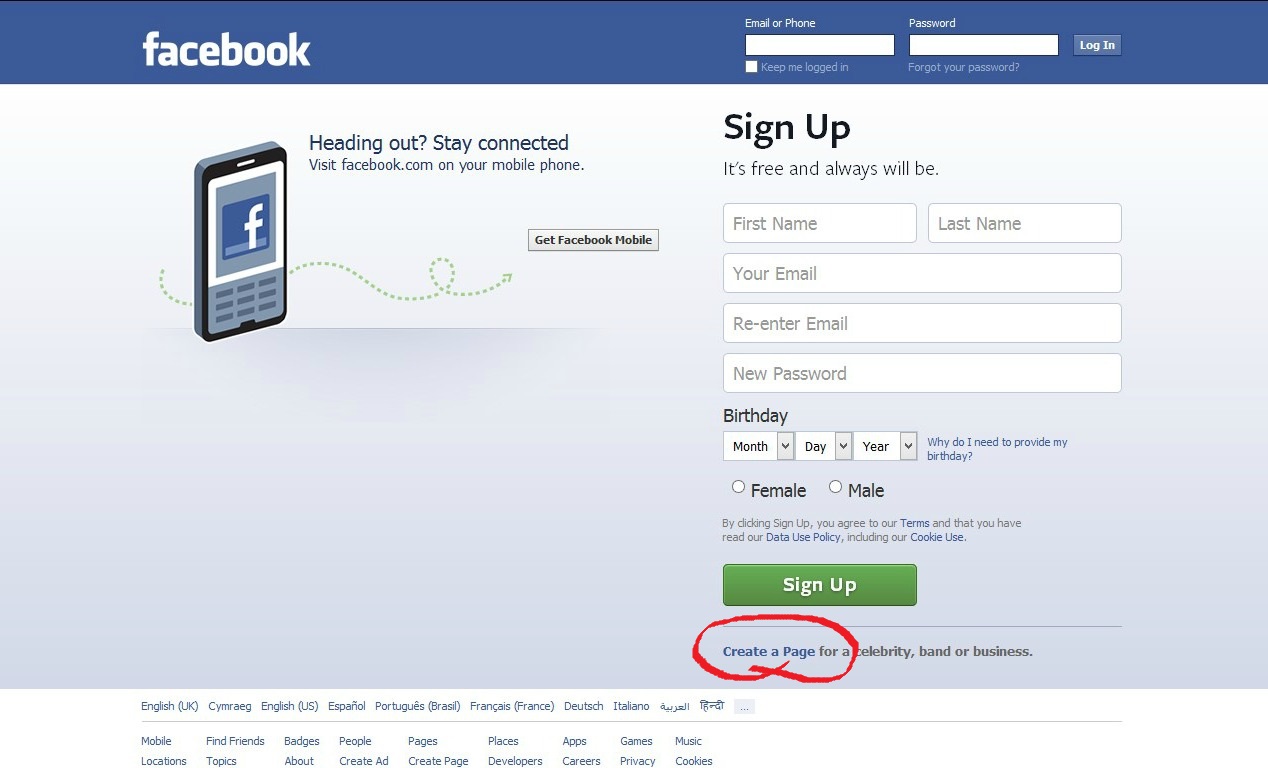
To get started with a Facebook page you can click on the ‘create a page’ link at the bottom of the Facebook login screen, which will then ask you to log in to your personal profile, or you can simply click here if you are already logged in.
Step 2 – Create a page
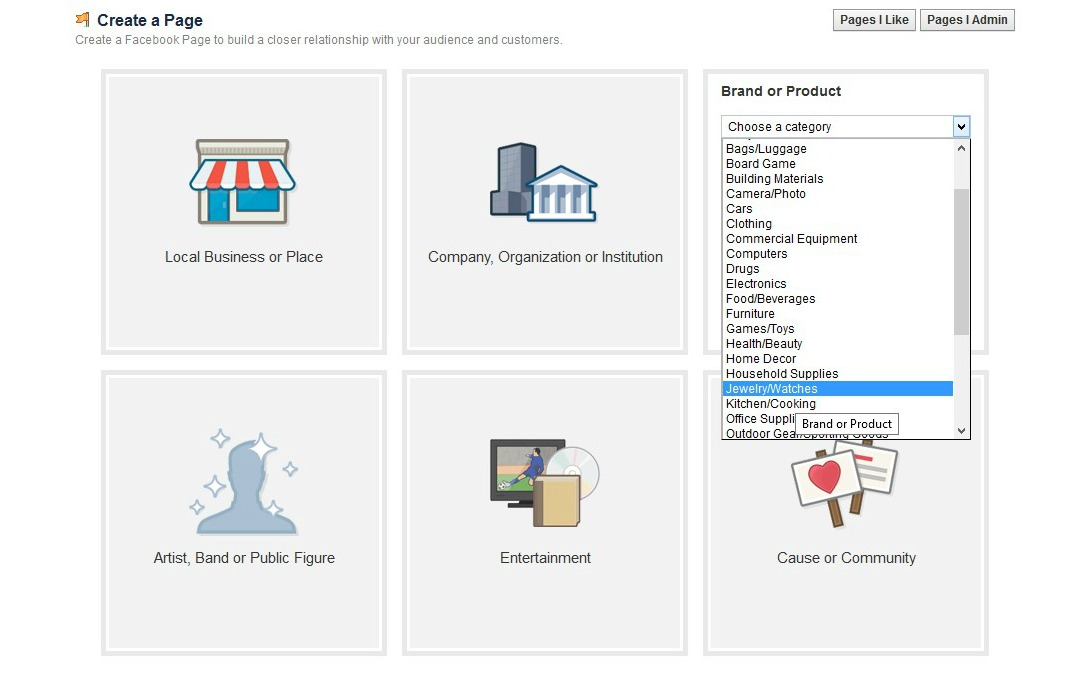
On the ‘create a page’ screen, choose the tile that best suits your business. For example a florist or cater with a local reach might choose ‘local business or place’ while a nationwide bomboniere supplier or jewellery designer might choose ‘brand or product’. Next use the drop down menu within the tile to choose a category for your business.
Next you need to add a name for your Facebook page.
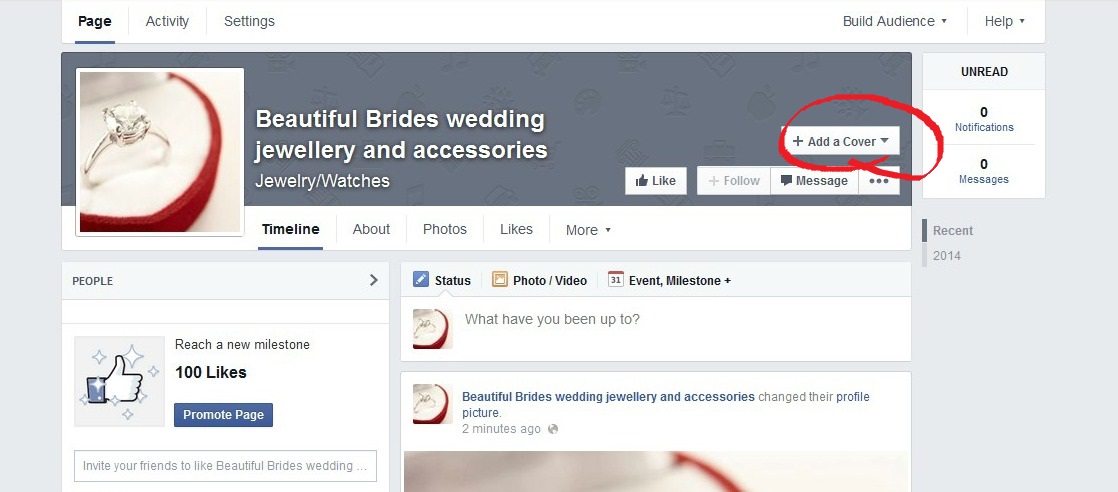
Think carefully about the name you choose; it will usually be the name of your business, but you might want to add some relevant keywords so it is picked up in search results. For example a bridal jewellery supplier called ‘Beautiful Brides’ might want to name its page ‘Beautiful Brides wedding jewellery and accessories’. Your page name has a character limit of 70 and can be changed up until your page has 200 likes.
Finally add your business address and phone number, check out the Facebook page terms and conditions, and click on the ‘Get Started’ button.
Step 3 – Add an about
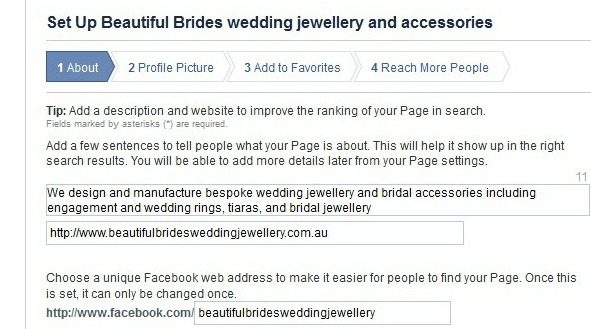
At this point Facebook will ask you to add a description of your page which will appear in search results and on your Facebook page’s home page. This has a character limit of 155 and should include keywords that are relevant to your business, written naturally into a description of what your business is.
You should also add your business website and create a Facebook web address. Finally you will need to confirm that you are a real business or brand before you click on ‘save info’.
Step 4 – Add a profile picture
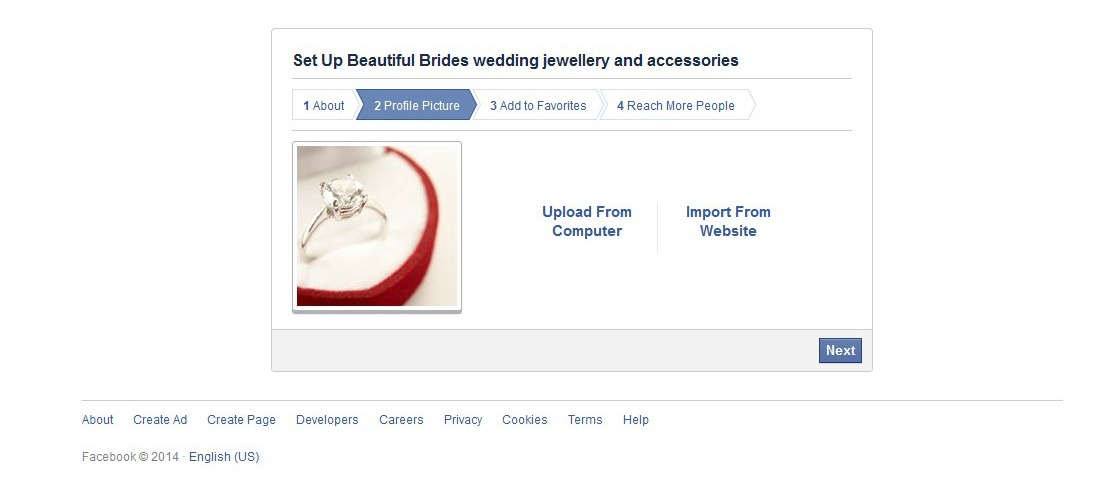
The next tab requires you to upload a profile picture for your page. This is a small square picture that will appear next to every piece of content that you post on Facebook, so it needs to be instantly recognisable as your business.
Most businesses choose to use their logo as a profile picture, but if you don’t have one, or your personality is an important part of your business – for example a marriage celebrant – you might want to use a head shot instead.
A product image would also work if it’s something that won’t go out of date or become obsolete. The ideal image size for your profile picture is 180 x 180 pixels, but you can use a larger image and it should resize automatically.
Make sure your chosen image is saved to your computer and then click on ‘upload from computer’.
Once you’ve added your profile picture and clicked on ‘next’, you can add your page to the favourites section on your personal profile page to make it easier to access. Finally Facebook will ask you to create a paid Facebook advert under the tab ‘reach more people’. Most businesses will want to skip this page and only consider Facebook advertising once they have plenty of content on their Facebook page.
At this stage Facebook will give you a quick tour of your page, showing you where different functions are and encouraging you to ‘like’ your own page and invite your e-mail contacts to do the same. Again you will generally want to skip these actions and wait to invite people to like your page until you have plenty of great content on there for them to look at and share.
Step 5 – Add a cover image
The final stage before you start posting on your Facebook page is to add a cover/Timeline image. A cover image is a banner style image that runs across the top of a Facebook page. It gives character to your page and personalises it to your brand or business. It’s a good idea to choose a cover image that is similar in style and colour to your business website to give a feeling of continuity.
You can add a cover image by clicking on the ‘+Add a cover’ button at the top of your page. The size of the cover image panel is around 850 x 315 pixels, but you can upload any large landscape image and move it around until you get a cover that you are happy with. You can include some text – such as your website or a call to action – in your cover image as long as it doesn’t take up more than 20% of the image area.
And that’s it!
You’re ready to go ahead and start posting lots of fabulous content for your Facebook followers.

